24,535
ARTICLES
ON THIS WIKI
ON THIS WIKI
Tutorial:Installing additional mods

|
This article is part of the ATLauncher Wiki's Tutorials section. |
This article will show you how to install additional mods.
Contents
Prerequisites[edit]
Have a mod pack installed through the FTB Launcher.
Step 1: Download the Mod[edit]
Firstly, find a mod compatible with your mod pack. Make sure that the mod is compatible with your mod pack's Minecraft version.Step 2: Run the Launcher[edit]
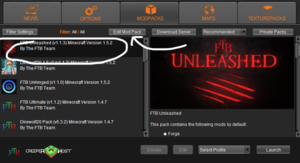
Open the launcher and select your mod pack. Click the button labeled "Edit Mod Pack".Step 3: Choose Install Location[edit]
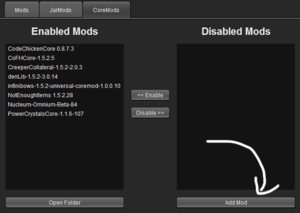
If the mod needs to be installed inside the minecraft.jar file, click on "JarMods". If the mod needs to be installed to the coremods directory, click on "CoreMods". If the mod is neither of the two, make sure the "Mods" tab is selected.
Step 4: Install the Mod[edit]
Click "Add Mod" in the bottom right. Select the jar or zip file that you downloaded and contains the mod.Step 5: Enable the Mod[edit]
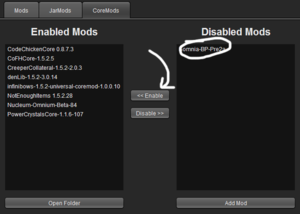
Click on your mod on the right hand side. Click enable.Step 6: Have Fun![edit]
Launch game, and play test it!


 Discussion

